How to Add Alt Text in Word: A Step-by-Step Guide Effortlessly
Creating accessible documents ensures everyone can engage with your content, including those using screen readers. This guide explains how to enhance accessibility in Microsoft 365 by incorporating descriptive labels for visuals. These labels, often called alternative descriptions, help convey the purpose of images when they can’t be seen.
Microsoft Word offers built-in tools like the Accessibility Checker to simplify this process. You can manually write descriptions or use automated suggestions. Both methods ensure your document meets modern accessibility standards while improving its search engine visibility.
Properly labeled visuals benefit users with disabilities and boost your content’s reach. Search engines prioritize pages with clear, context-rich details about embedded media. This guide provides practical steps to implement these labels efficiently, using real examples from Microsoft’s latest features.
Key Takeaways
- Descriptive labels make documents inclusive for screen reader users.
- Microsoft 365 includes tools like the Accessibility Checker for error detection.
- Manual and automated options streamline the labeling process.
- Well-crafted descriptions improve SEO performance.
- Clear visuals enhance user experience across all audiences.
Understanding the Importance of Alt Text in Documents
Effective alt text transforms visuals into accessible information. This feature converts images into readable content for assistive tools like screen readers, ensuring equal access for users with disabilities. Without it, charts, photos, and diagrams become invisible barriers in your document.
Defining Alt Text and Its Role in Accessibility
Alt text acts as a substitute for non-text elements. When a screen reader encounters an image, it reads the description aloud. For example, a graph titled “Sales Growth 2023” might have alt text explaining trends without repeating the title.

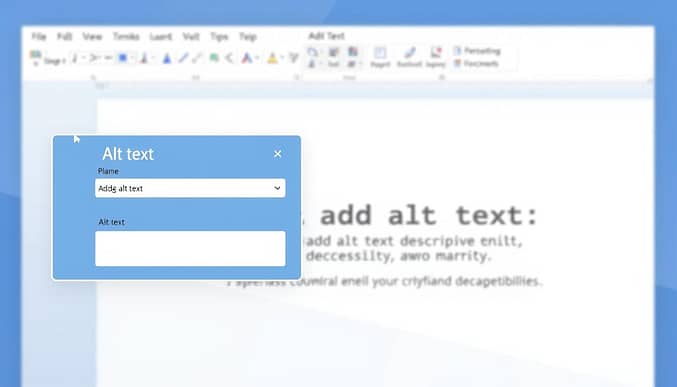
Microsoft Word’s alt text pane simplifies this process. Right-click any visual, select “Edit Alt Text,” and enter a concise description. Avoid phrases like “image of” – focus on context. Tables require similar clarity. Describe their purpose, like “Comparison of quarterly revenue across regions.”
How Alt Text Benefits SEO and User Experience
Search engines index alt text to understand visuals. A well-crafted description boosts your document’s visibility for relevant queries. It also improves navigation for all users, not just those with disabilities.
For guidance, refer to Microsoft’s alt text guidelines. Keep labels under 125 characters and prioritize accuracy over creativity. Overloading the pane with details confuses both algorithms and readers.
How to Add Alt Text in Word Using Microsoft 365 Tools
Microsoft 365 simplifies creating accessible documents with built-in features. Three core tools streamline the process: the Accessibility Checker, manual editing, and automatic generation settings. These options ensure visuals are properly labeled for screen readers and search engines.
Using the Accessibility Checker to Identify Issues
Navigate to the Review tab and select “Check Accessibility.” The tool scans your document for missing descriptions or unclear labels. Warnings highlight images needing attention, making it easy to prioritize edits.

Step-by-Step Instructions for Manually Editing Alt Text
Right-click any image and choose “View Alt Text.” A pane opens where you can type a concise description. For example, “Bar chart showing 2023 sales growth by region” provides context without redundancy. Avoid vague phrases like “company graphic.”
Managing Automatic Alt Text Generation Settings
Enable auto-descriptions via File > Options > General. Check “Automatically generate alt text for me.” Review each suggestion—AI sometimes misses details. If a photo’s auto-text reads “person outdoors,” update it to “Hiker traversing Rocky Mountain trail.”
Combine manual and automated options for efficiency. Tools in Microsoft 365 apps let you balance speed with precision, ensuring every visual meets accessibility standards.
Best Practices and Common Pitfalls in Creating Alt Text
Crafting effective alt text requires balancing clarity with brevity. Microsoft’s tools simplify this process, but avoiding common errors ensures your visuals serve assistive technology users effectively. Let’s explore strategies to maximize impact while sidestepping mistakes highlighted in common alt text pitfalls.
Writing Concise and Informative Descriptions
Focus on the purpose image conveys rather than its appearance. A photo titled “office.jpg” might need alt text like “Team collaborating in modern conference room.” Avoid repeating captions or filenames – screen readers already announce “image” before reading your description.
| Effective Example | Problematic Example |
|---|---|
| “Line graph comparing Q1 and Q2 sales growth” | “Chart with blue and red lines” |
| “Golden retriever playing fetch in park” | “Dog picture” |
Use complete sentences with punctuation. Start with critical details using the inverted-triangle method: “Protesters holding climate action signs outside Capitol Building” prioritizes context over secondary elements.
When to Mark an Image as Decorative
Right-click images serving purely aesthetic roles – like dividers or background patterns – and choose “Mark as decorative.” This tells assistive technology to skip them. For instance, a floral border in a newsletter doesn’t need description unless it relates to content.
Follow these steps in text Microsoft workflows:
- Right-click the visual element
- Select “View Alt Text”
- Check “Mark as decorative”
Overloading descriptions confuses people relying on screen readers. A decorative icon labeled “Blue arrow pointing right” adds noise. Instead, mark it decorative and let surrounding text explain its function.
Conclusion
Integrating descriptive labels for visuals in Microsoft Word elevates document accessibility and search performance. Tools like the Accessibility Checker streamline identifying unlabeled charts or tables, while manual editing ensures precision. Automated suggestions save time but require human review for accuracy.
Clear descriptions benefit users relying on assistive technology and boost SEO rankings. For example, a detailed label for a sales chart helps screen readers and search algorithms grasp its purpose. Always prioritize context over generic terms like “picture” or “graphic.”
Adopt these practices today to create inclusive content. Review existing documents using the Review tab and update descriptions as needed. For advanced techniques, explore detailed guidelines on optimizing SmartArt and complex.
Well-crafted labels make your work accessible to all audiences while enhancing its digital visibility. Start refining your approach now – every table, image, and diagram deserves meaningful context.